Get started using Epiphan Edge with LiveScrypt
The LiveScrypt transcription solution has two main components: a hardware device and an automated cloud-based transcription service. You must pair the LiveScrypt device to your free Epiphan Cloud account that has transcription services set up before you can use the device for live transcription. You can set up an account the first time you pair your LiveScrypt device or you can set it up in advance, see Login and account information.

A device ID pairing code appears on the touch screen when the LiveScrypt device isn't paired. You'll need that to pair the device with Epiphan Cloud.
Before you begin
Before you can pair a LiveScrypt device to your Epiphan Cloud team and start using it, you'll need:
- An Epiphan Cloud account, see Login and account information.
- A LiveScrypt device connected to the Internet.
- Access to LiveScrypt's front screen.
- An admin computer connected to the Internet.
- Internet access
For full instructions to set up and operate your LiveScrypt device with Epiphan Cloud, see the LiveScrypt User Guide.
Now that you're ready to get started with Epiphan Cloud, let's log in and pair your device.
Log in and pair the device
Log in and pair your LiveScrypt device
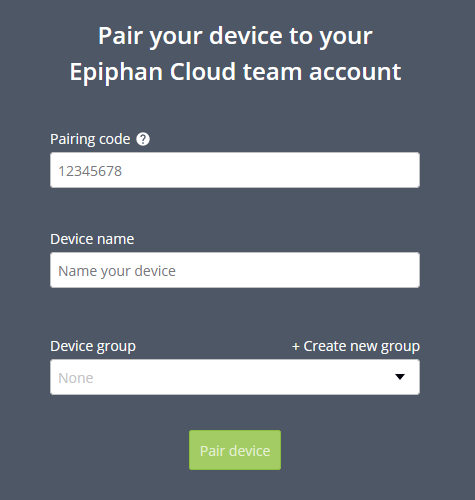
- Using a web browser on your admin computer, log in to Epiphan Cloud at: go.epiphan.cloud
- In the far-right corner of the header bar, click Pair device to pair your LiveScrypt device to your default team.
-
Enter the pairing code and a name for the device.
- (Optional) Create a group for your paired devices or add the device to an existing group. An Epiphan Cloud Premium plan is required for this feature.
- Select Pair device. Your device is now paired and the LiveScrypt device Settings page opens.

TIP: While LiveScrypt is paired, you can configure your device using LiveScrypt's touch screen, the Web UI, or Epiphan Cloud. The changes you make update automatically in Epiphan Cloud. For full instructions to setup and operate your LiveScrypt device, see the LiveScrypt User Guide.
Now start transcribing!
Start transcribing from the LiveScrypt device Settings page
- If the LiveScrypt device Settings page isn't already open, click the LiveScrypt menu icon in the left navigation bar to open the LiveScrypt Devices page, then click a device name in the list to open the Settings page for that device.
- Click Start transcription in the top left corner of the LiveScrypt device Settings page.
- When you're done, click the red stop icon to stop transcribing.
![]()
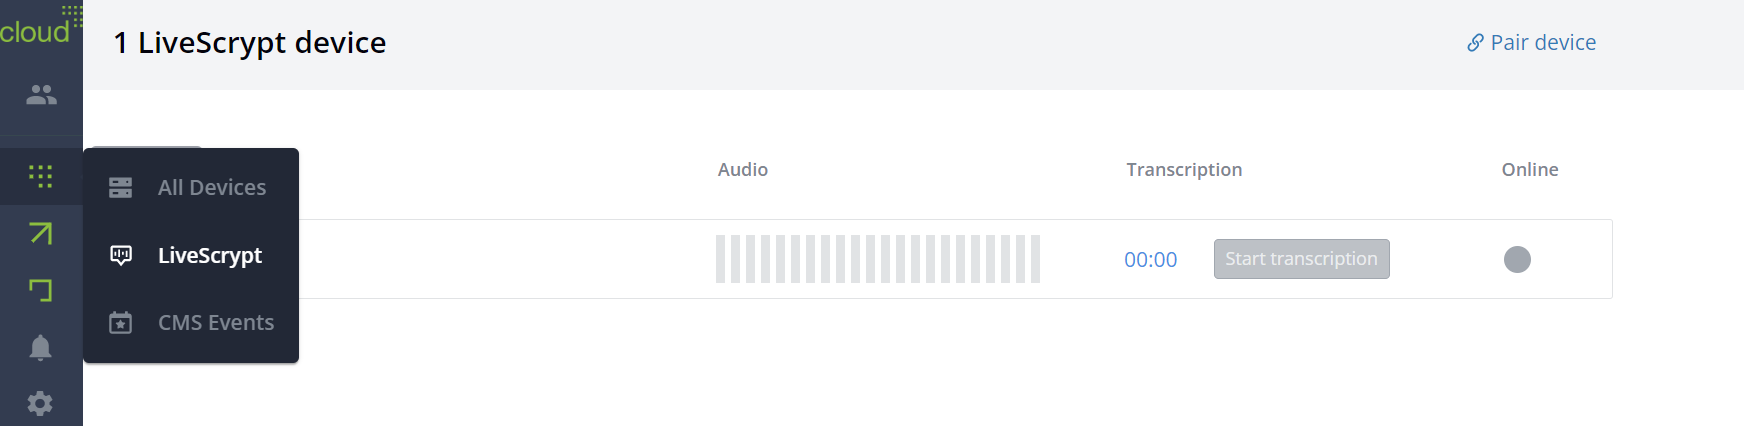
Start transcribing from the LiveScrypt Devices page
- Click the Edge > LiveScrypt menu icon in the left navigation bar to open the LiveScrypt Devices page, then click Start transcription in the row for the LiveScrypt device.
- When you're done, hover over the active transcribing button and click when the label changes to Stop Transcribing.

Start transcribing from the Devices Dashboard
- From the left navigation bar, select Edge > All Devices to open the Devices Dashboard.
- Click Start transcribing in the row for the LiveScrypt device.
- When you're done, hover over the active transcribing button and click when the label changes to Stop Transcribing.

Finally, download the .SRT or .TXT file of your session
Download .SRT and .TXT files
- Open the LiveScrypt device Settings page, do one of the following:
- From the Devices Dashboard, click the device name or click the three dots at the end of the device's row and select Settings.
- From the LiveScrypt Devices page, click the device name in the list of devices.
TIP: If the LiveScrypt device is unpaired and permanently offline, it won't appear in the list of LiveScrypt devices.
- From the LiveScrypt device Settings page, select the Sessions tab to see a list of the archived transcription sessions for that device.
- Click the blue download button for the file you want to download and follow the prompts.
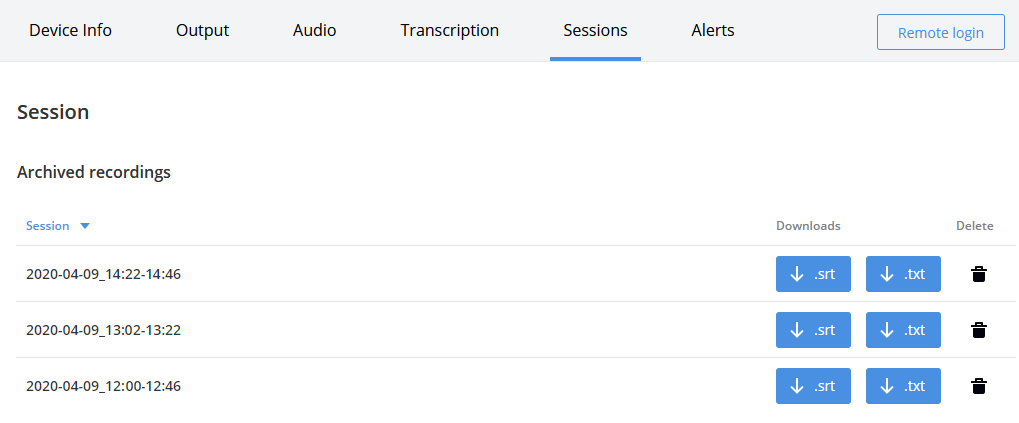
For more information about .SRT and .TXT files, see Download and delete .SRT and .TXT files.
