Pearl Nexus User Guide
Set up Panopto authentication for ad hoc events
Panopto users can create unscheduled ad hoc events using the Admin panel. You can set up Pearl Nexus to allow users to authenticate using their local Panopto login credentials, their credentials for a third-party LMS integrated with Panopto (like Canvas), and SAML 2.0 credentials if configured on Panopto.
The Pearl Nexus uses a JavaScript web application to negotiate authentication with Panopto. You must create a new API client ID and add two URL redirects in Panopto for ad hoc event authentication to work.
Before you begin, you need:
- Admin access to Panopto.
- A Pearl Nexus remote recorder that's registered with Panopto.
Important considerations
- Record all API client IDs and secret keys that are generated in Panopto somewhere safe. The ID and key cannot be retrieved after the screen is closed and must be regenerated if lost.
- You can use the same API Client ID to enable ad hoc authentication on multiple Pearl Nexus systems; however, you must create a separate API client URL redirect for the web-based Admin UI of each individual Pearl Nexus device.
- Third-party application authentication for ad hoc events is only supported for Panopto.
Enable ad hoc authentication on Pearl Nexus
- Log in to Panopto as an administrator.
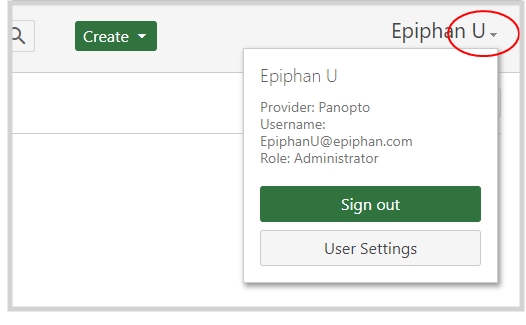
- In the header bar, click the arrow beside your user name and select User Settings. The User Settings page opens.
- Create the API Client ID. Do the following:
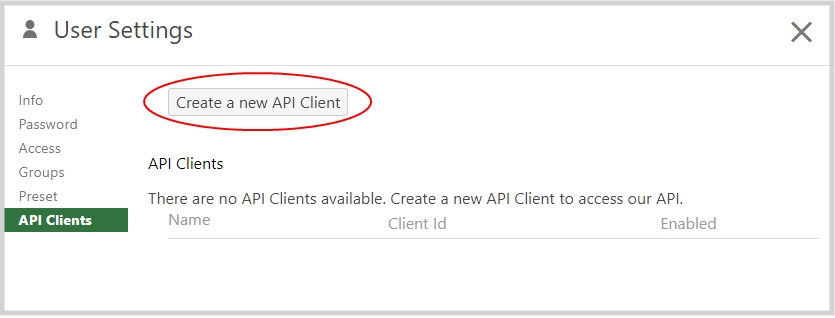
- From the User Settings page, click API Clients, and then click Create a new API Client. The Create API Client page opens.
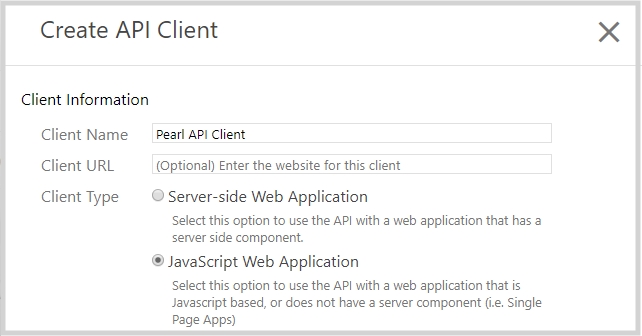
- From the Create API Client page, enter a unique name for the Pearl Nexus API client in the Client Name field. If a client already exists in Panopto with that name, choose a different name.
- In the Client Type field, select JavaScript Web Application. .
- On the New API Client created pop-up, record the Client ID and the Client Secret for future reference, and then click OK. The new Pearl API Client appears in your list of API clients.
- Add a URL redirect for the web-based Admin panel to the Pearl API Client. Do the following:
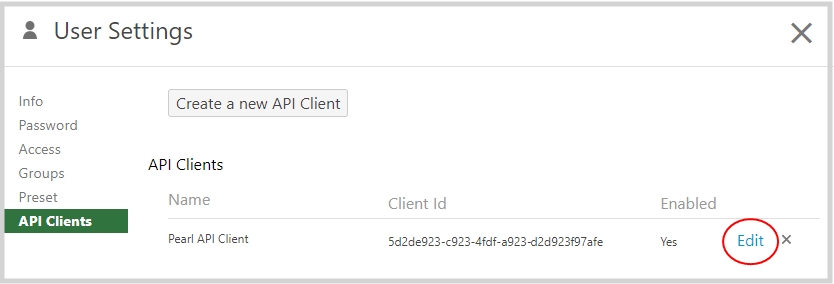
- From the User Settings page under API Clients, click Edit beside the Pearl API Client that you just created.
- In the Allowed Redirect URLs field, enter http://<device_ip>/admin/events where
<device_ip>is the IP address of Pearl Nexus. - In the URL Type field, select Redirect URL.
- Click Add URL. The Admin panel URL redirect appears in the Allowed URL list.
If Pearl Nexus is configured for https, enter
https://instead ofhttp://.
- Log in to the Admin panel as admin, see Connect to the Admin panel.
- From the Configuration menu, click CMS. The Content management system configuration page opens.
- In the Unscheduled ad hoc events section, enter the Pearl Nexus API client id that was generated earlier, and then click Apply.
