Disable or enable audio and output port volume
If you're displaying a channel as the source for your video output port, audio for that channel is also encoded and sent over the port by default. You can disable the audio on the output port using the Admin panel. You can also adjust the volume of the audio on the video output port using the Admin panel. Disabling the audio on the video output port improves latency for the port.
If you're displaying a video input as the source for your video output port, you can select an audio source and adjust the volume. Audio is taken from the video input source you've selected for the video output port by default.
Disable audio for a channel on the video output port and adjust the volume using the Admin panel
- Login to the Admin panel as admin, see Connect to the Admin panel.
- From the Output ports menu, click the output port ( ). The video output port configuration page opens.
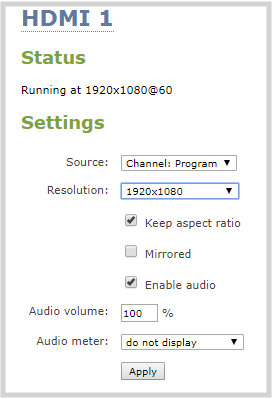
- For a channel, do the following:
- Check Enable audio to include audio in the output. Leave this unchecked for no audio with the video.
- (Optional) For a channel with audio enabled, adjust the volume. Enter a value from 0 to 100 percent in the Audio volume field.
- (Optional) For a channel with audio enabled, choose whether or not to display the audio meter from the Audio meter drop-down menu.
- If displaying the audio meter, select horizontal or vertical from the Audio meter orientation drop-down menu to change the orientation of the displayed audio meter.

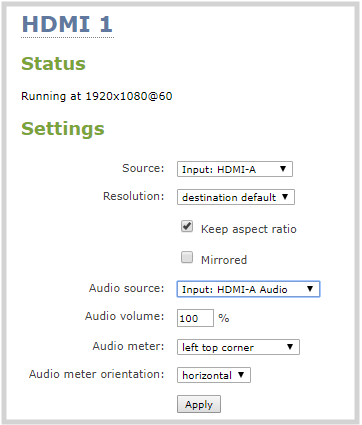
- For input sources, do the following:
- Select an Audio source from the drop down list.
- (Optional) Adjust the volume. Enter a value from 0 to 100 percent in the Audio volume field.
- (Optional) Choose whether or not to display the audio meter from the Audio meter drop down.
- If displaying the audio meter, select horizontal or vertical from the Audio meter orientation drop down to change the orientation of the displayed audio meter.
- Click Apply.


