Create a streaming destination using Epiphan Cloud
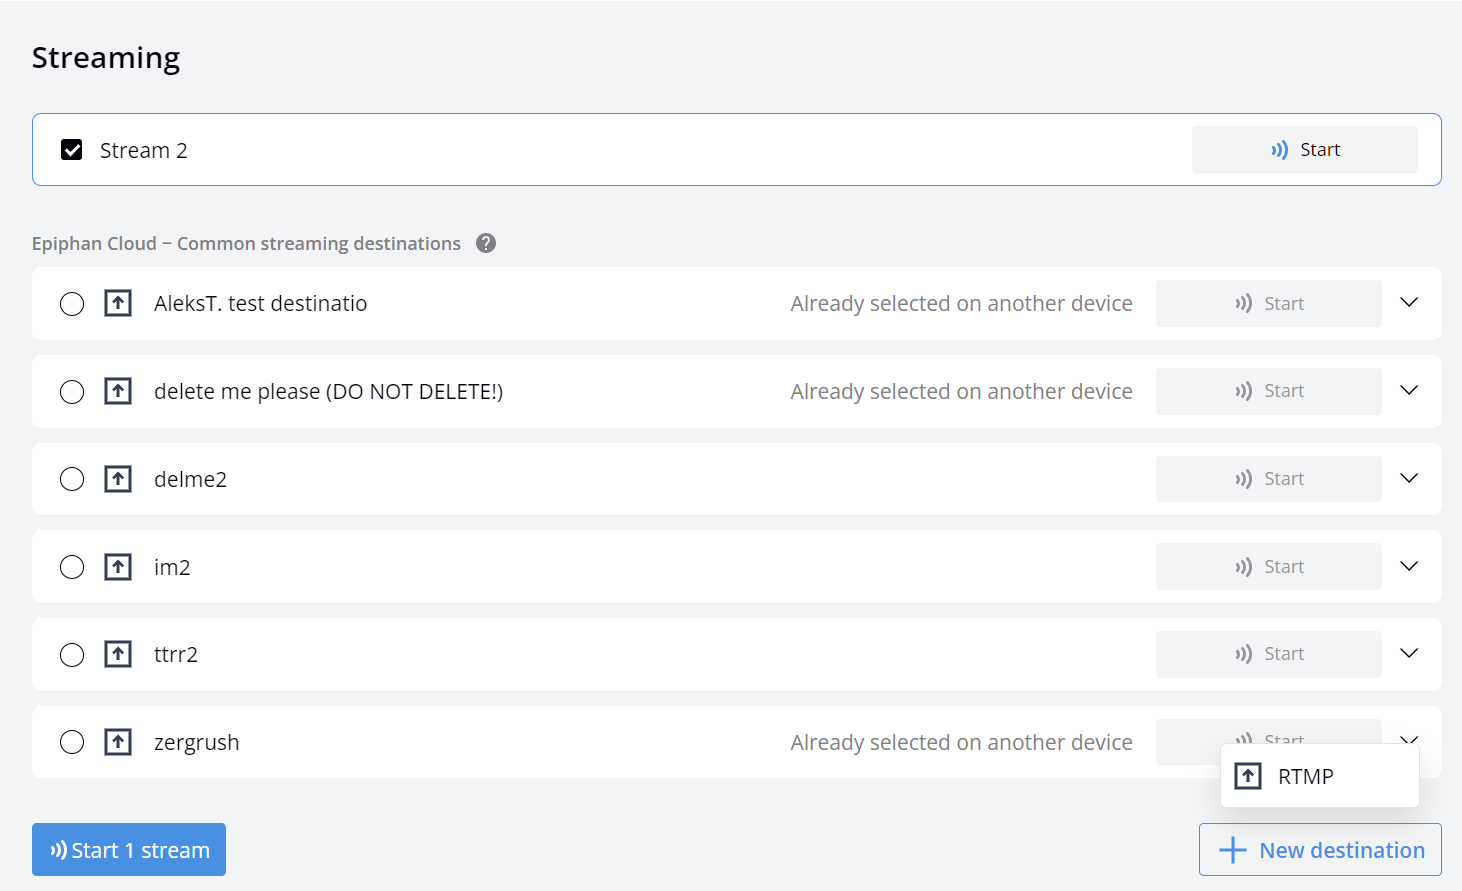
You can create custom RTMP streaming destinations for your Pearl family devices directly from the Channel Details page using Epiphan Cloud. Stream destinations that you create in Epiphan Cloud are added to a common list that is accessible to all Pearl family devices that are paired with your team.

Common streams that are created using Epiphan Cloud are listed below the channel streams that are created locally on your Pearl family devices. You can select only one common Epiphan Cloud streaming destination at a time when streaming.
Before you begin
Before you create common streaming destinations using Epiphan Cloud, you'll need:
- A Pearl family device that is set up with Internet access and has the Epiphan Cloud feature enabled.
- For a custom RTMP stream, you need the destination server URL and the stream key.
Create and delete common streaming destinations from the Channel Details page
Create a custom RTMP streaming destination from the Channel Details page
- Go to the Channel Details page to add a new destination, do one of the following:
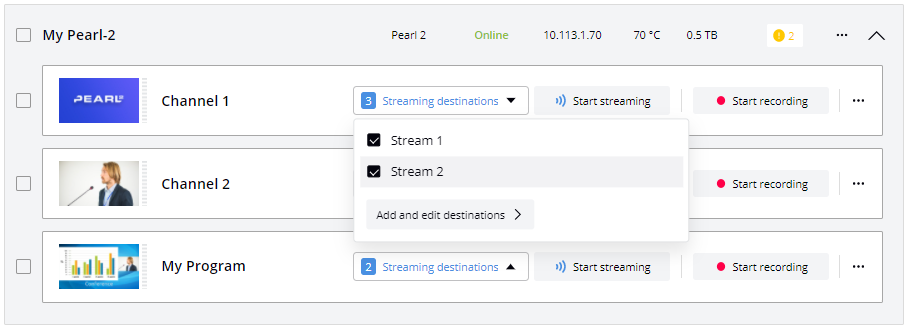
- From the Devices Dashboard, click Streaming destinations in the row for the channel and select Add and edit destinations.
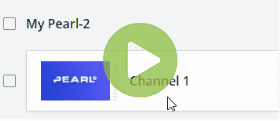
- From the Devices Dashboard, click the channel preview icon or click the channel name.
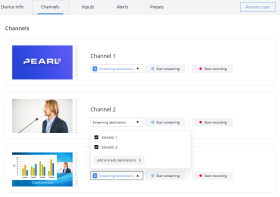
From the Channels list, click Streaming destinations in the row for the channel and select Add and edit destinations.
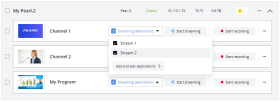
- From the Channel Details page, click + New destination in the lower right corner of the page and select RTMP.
- In the pop up menu, enter a unique name for the stream, the destination server URL, and enter a stream key if needed. When you're done, click Save.


Delete a common streaming destination from the Channel Details page
- Go to the Channel Details page to add a new destination, do one of the following:
- From the Devices Dashboard, click Streaming destinations in the row for the channel and select Add and edit destinations.
- From the Devices Dashboard, click the channel preview icon or click the three dots at the end of the channel's row and select Settings.
From the Channels list, click Streaming destinations in the row for the channel and select Add and edit destinations.
- From the Channel Details page, click + New destination in the lower right corner of the page and select RTMP.
- In the pop up menu, enter a unique name for the stream, the destination server URL, and the stream key. When you're done, click Save.
Common streaming destinations on the Streaming destinations page
View the Streaming destinations page from the Settings
Click the Settings icon in the side navigation panel and select Streaming destinations. The Streaming destinations page opens.

If common streaming destinations are configured, they are listed on the Streaming destinations page.
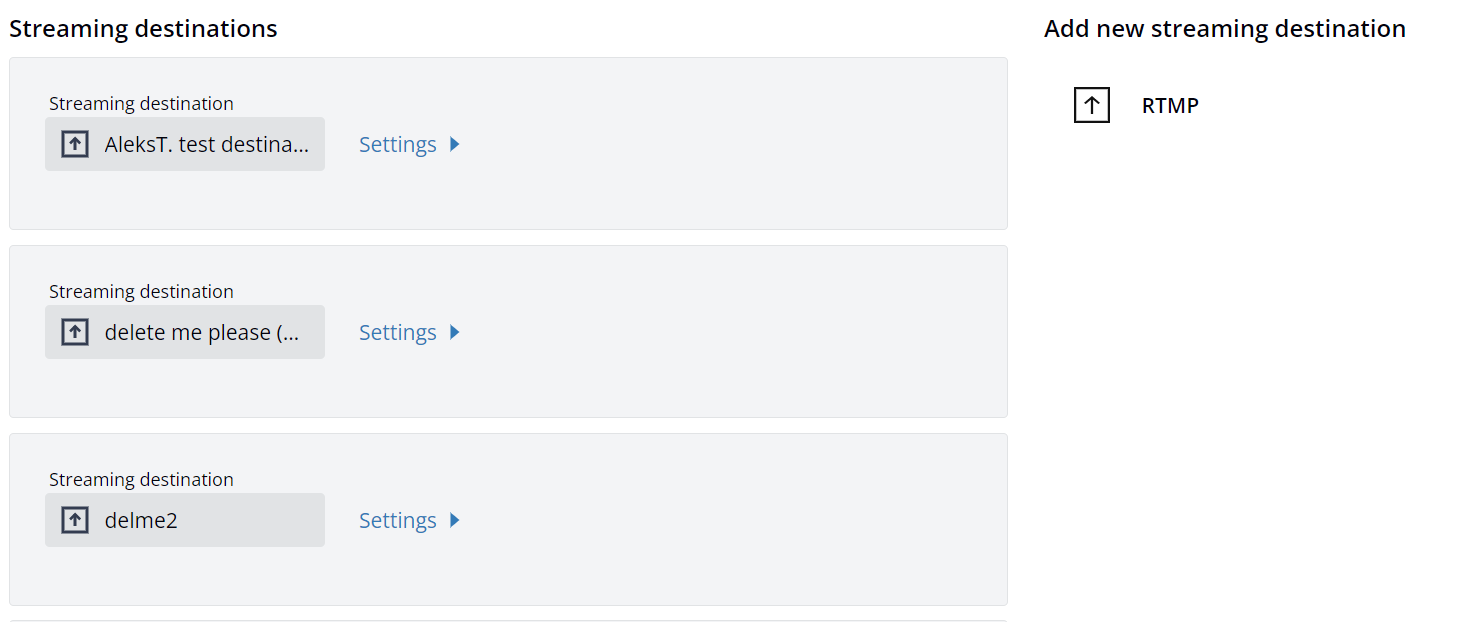
Create a common streaming destination from the Streaming destinations page
Creating a common streaming destination from the Settings in Epiphan Cloud involve the same steps you perform when creating a common streaming destination from the Channel Details page. See the procedures to create a custom RTMP streaming destination from the Channel Details page for specific steps.
- Click the Settings icon in the side navigation panel and select Streaming destinations. The Streaming destinations page opens.
- Click the custom RTMP icon and then enter a unique name for the stream, the destination server URL, and the stream key in the pop up window.
- New streaming destinations appear on the Streaming destinations page.
TIP: The new streaming destination also appears on the Channel Details page, as well as the channel streaming page in Pearl's Admin panel.
Delete a common streaming destination from the Streaming destinations page
- Click the Settings icon in the side navigation panel and select Streaming destinations. The Streaming destinations page opens.
- Click the custom RTMP icon and then enter a unique name for the stream, the destination server URL, and the stream key in the pop up window.
- New streaming destinations appear on the Streaming destinations page.
TIP: The new streaming destination also appears on the Channel Details page, as well as the channel streaming page in Pearl's Admin panel.
