Add a watermark
Using the Epiphan Capture Tool, you can add a watermark in the form of a time-stamp or other static on-screen text to your captured video or images.

Add a timestamp
You can add a timestamp to your captured video by choosing from one of the pre-created formats and selecting the font, size, location and color.
Start by connecting your video grabber to the capture workstation and your source to the video grabber. Launch the capture tool and configure it for recording video following the instructions in Record a video, if needed.
To configure a timestamp watermark:
- From the Tools » Options dialog, select the On-Screen Text tab.
- Check the Timestamp checkbox.
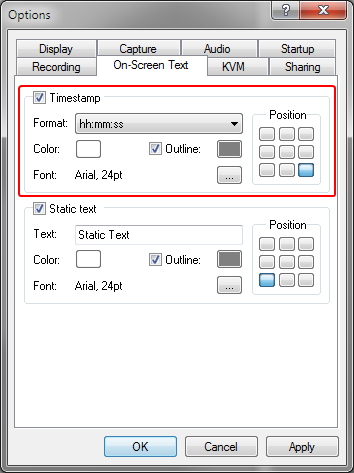
- Choose a timestamp format from the Format drop down box.
- If desired, change the color and outline color from the default white and gray values.
- Click on a location in the Position grid to specify the location of the timestamp.
- Change the Font type and size by clicking the elipsis (...) next to the Font description; a font selection dialog opens.
- When you are done configuring, click Apply to see the changes while keeping the dialog open for futher tweaks, or click OK to apply your changes and close the dialog.
Note that you can include both a timestamp and a static text watermark.
Add a static text watermark
You can add static text to your captured video by adding your text and selecting the font, size, location and color.
Start by connecting your video grabber to the capture workstation and your source to the video grabber. Launch the capture tool and configure it for recording video following the instructions in Record a video, if needed.
To configure a static text watermark:
- From the Tools » Options dialog, select the On-Screen Text tab.
- Check the Static text checkbox.
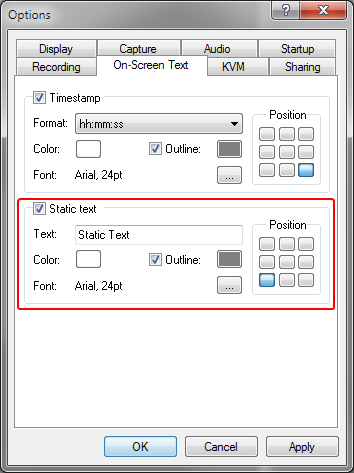
- In the Text field, enter your text string.
- If desired, change the color and outline color from the default white and gray values.
- Click on a location in the Position grid to specify the location of your static text watermark.
- Change the Font type and size by clicking the elipsis (...) next to the Font description; a font selection dialog opens.
- When you are done configuring, click Apply to see the changes while keeping the dialog open for futher tweaks, or click OK to apply your changes and close the dialog.
You can have both a text watermark and a timestamp mark on your captured video or images. Give them both a try to see what you like best.
Tip: You can use a custom font generator to generate a font that has a monotone version of your company logo or other graphic to overlay as "text" on the image. Using this trick, it will appear like you have a graphical watermark.
