Set a custom UVC mode
The AV.io+ Config tool gives users the ability to specify a custom UVC mode for output. For settings to persist after power cycling, please allow 5 seconds before disconnecting or restarting device.
To set a custom UVC mode with the AV.io+ Config tool:
- If needed, install the AV.io+ Config tool. For details specific to your OS, see Install the AV.io+ Config tool.
- Connect your AV.io HD+ device to your computer, laptop, or notebook.
- Open the AV.io+ Config tool.
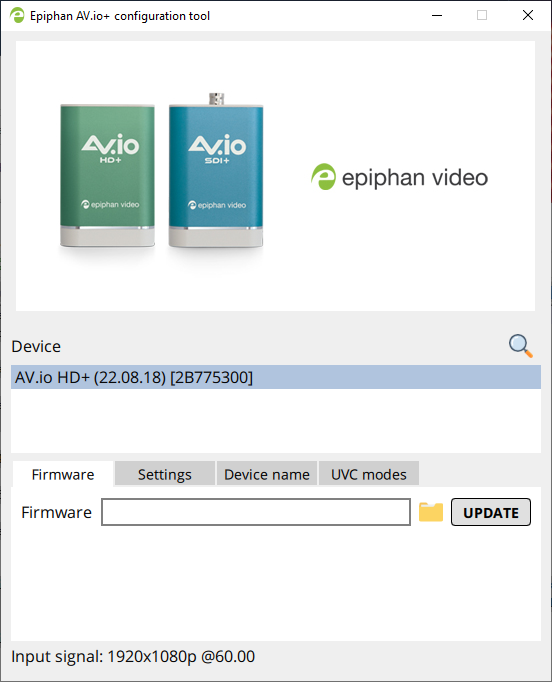
- Select your AV.io HD+ device from the list under the Devices heading.
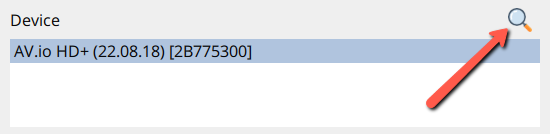
If your video grabber is not displayed, press the Refresh icon to refresh the list of connected devices.
- Click the UVC modes tab; the UVC modes page appears.
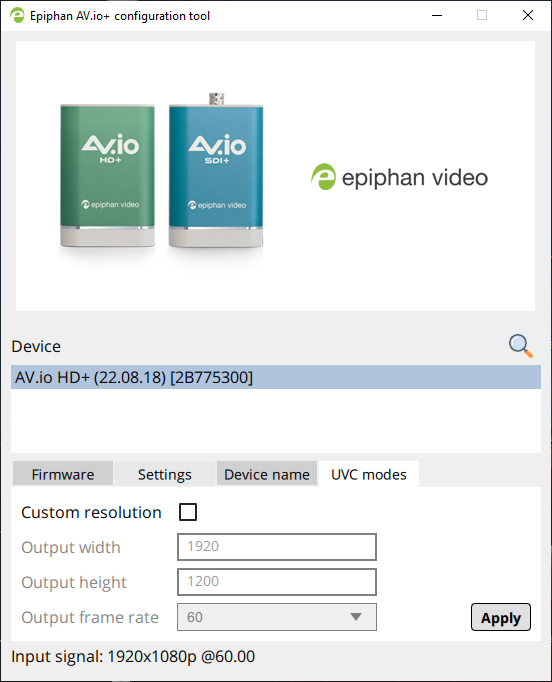
- To create a custom resolution, click the check box for Custom resolution. The grayed-out area becomes open for changes.
- Select the text box labeled Output Width, erase the number that is currently in the box, and type out the width of the custom resolution you wish to use. Then do the same for the resolution height in the text box labeled Output Height.
- Select an Output frame rate from the drop down menu.

- Click Apply; the custom resolution you defined will now be the only output resolution that you are allowed to select from the settings of the third-party application of your choice.
