Companies of all shapes and sizes are creating more video content than ever, for both internal and external use. The 2019 State of Video in the Enterprise report by Kaltura asked employees of various large companies whether the amount of video used for any purpose at their organization changed in the last three years. More than half of respondents said that the amount of video used has increased over the time period.
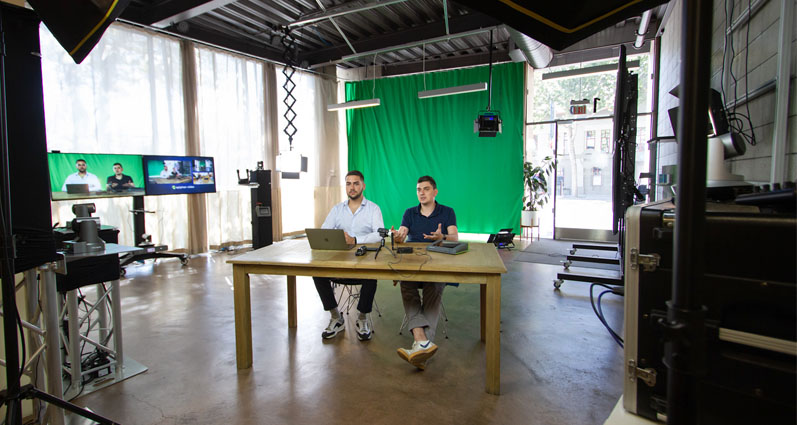
A studio environment is ideal for creating professional, high-quality videos. In addition to pre-recorded content, live video is also becoming a key tool for companies. For example, CEOs and guest experts are often invited to go live on national television.
Problem is, video studio spaces aren’t always readily available: you need to find one, book time and a film crew, travel to the location, etc.
The solution is to build a studio on your own premises. That may sound daunting, but we’ll walk you through the process and tell you what equipment you need.
Download the guide: Building the ultimate space for video
Our free guide can help you make the vision of a fine-tuned dedicated space for video production a reality. Inside you'll find a host of actionable tips to transform how your organization does video.
Get your free copy3 benefits of building an in-house corporate video production studio
1) Lower production costs
By building an in-house video studio, corporations can minimize their employees’ travel time and save on expenses. Executive time is really expensive. If a CEO needs to appear on five different live TV programs in one day, then having an on-prem studio set up and ready to go will save them the trouble of visiting every studio individually. Additionally, with frequent studio use corporations can save money on studio rent over time.
2) Reduce turnaround time
There is no need to go through the hassle of scheduling a shoot, booking a studio, and traveling to the location. Your own on-site studio means no setup and teardown time; the space is always ready to use at your convenience. This provides great peace of mind for executives, who often have to go live at a moment’s notice. For the marketing team, this provides a whole new level of creative control.
3) Allow video creation for all departments
Various departments can make use of a dedicated video studio to record and stream product demos, training and onboarding videos, webinars, employee addresses, and much more. Employees with access to the space can simply book it just like they would a conference room. In fact, you can convert a conference room into a video studio without losing the room’s conferencing functionality. In other words, you can still use it as a conference room and choose whether or not you want to live stream or record.
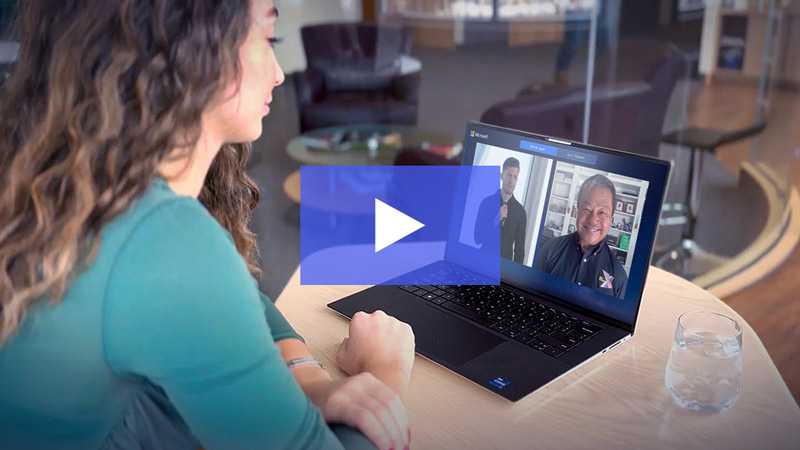
Going beyond collaboration at Microsoft
Learn how Microsoft used Epiphan Connect to elevate its global all-hands event into an engaging video experience.
Watch the videoKey considerations for your corporate video studio
Choosing the right space
While having dedicated video studio space is ideal, combining it with a meeting room is also possible. A permanent studio setup will save a lot of prep time and motivate employees to record. Studio time should be distraction-free for production staff. Setting up a booking system for the video studio room (similar to meeting room booking) will help ensure an uninterrupted workflow.
Room size
Generally, room dimensions should be no smaller than 12 feet by 18 feet. There should be at least four feet between the camera and the subject, and another four feet between the subject and the background. Shooting very close to a wall isn’t optimal because doing so can cast harsh shadows. That beautiful bokeh effect (heavily blurred background with perfect focus on the subject) always looks great on camera, but you need to get the spacing just right to create it.
Soundproofing
Finding a quiet space is often one of the most challenging aspects of setting up a corporate video studio, but it is also among the most important. After all, nobody wants air conditioning, construction, wailing sirens, and other background noises to end up in the final video. Additionally, sound will bounce off walls and create echoes if the space is too large and sparsely furnished. A space enclosed by four walls is a good start, but for best results, add acoustic foam panels or even hang up blankets to “dampen” echoes and outside sounds.
Essential production equipment
Your corporate video production studio will need reliable, high-end equipment. Expenses can add up quickly, so let’s have a look at what is absolutely imperative and what might be overkill.
Video
Cameras
To achieve a polished and professional look, the studio will need a high-end camera with great lenses. We recommend looking into HD and 4K cinema cameras first. This includes cameras like Canon EOS C-series, Blackmagic URSA or Pocket Cinema Camera, and Z CAM E2C. If your budget for a camera is on the lower side, consider looking into DSLRs like the Panasonic Lumix GH5. You can find more cameras we like in our
If you want to live stream from your studio as well, check out our best cameras for live streaming article. To be suitable for live streaming, a camera needs a “clean” HDMI out. This means that no UI overlays should be visible on the camera-out feed. Secondly, the camera has to stay active as opposed to shutting off automatically after a period of idleness. For more information see our comprehensive guide to choosing a camera for live streaming.
Camera lenses
Generally, there are two types of lenses to choose from:
- Prime lens – has a fixed focal length. Adjusting frame composition requires moving the camera back and forth.
- Zoom lens – has a variable focal length. Allows you to change the angle of view by zooming in and out.
When picking camera lenses, a lot depends on the size of the room. For corporate video studio production, we recommend zoom lens as they provide more control. As an example, in some of our experiments, we have found that a combination of two Panasonic Lumix G X Vario lenses, the 14-45mm f/2.8 and the 35-100mm f/2.8, works well: the former captures a wider studio angle, whereas the latter creates strong closeups.
How many cameras does the studio need?
While just one camera will do, we’ve found that having at least two camera angles can help create a more dynamic final video. We suggest strategically placing two cameras to create a wide shot and a close-up.
Stabilization
To stabilize the shot, it’s best to mount cameras on a tripod or something even sturdier like a truss or wall. You could also build your gear into a professional-grade equipment rack or cart to make your studio setup more mobile.
Audio
Microphones
Configuring the audio is often the trickiest part of any video production. The most important thing is microphone placement. A poorly placed microphone, no matter how expensive or professional it is, will not yield great results. Avoid using built-in camera microphones as these lack in quality and provide little control.
Microphones should be placed very close to the speaker. For this reason, investing in wireless lapel (aka lavalier or lav) microphones is a good idea. Choose something like the popular and versatile Sennheiser EW 100. Placed correctly, a cardioid condenser boom mic would also work. A boom microphone could either be mounted on the ceiling or a C-stand and hidden above the top edge of the film frame.
It’s important to note that, for a live interview, the interviewee would also need an IFB earpiece to be able to hear the questions while avoiding creating an echo.
Audio mixer
Another necessary component is a sound mixer. Why? Each voice is individual in terms of volume, timbre, and enunciation. Therefore, microphone settings need to be adjusted for each speaker on an individual basis. If two people are talking together, their volume settings must be adjusted in relation to each other. Additionally, mixers are able to determine baseline background noise levels and cancel them out in the final audio.
Getting audio right takes a lot of time and practice, which is why hiring a professional to help with audio will save a lot of time and trouble. For more detailed information on the different types of audio gear, check out our essential audio equipment article.
Lights
Lighting setups
First off, using artificial lights is generally better than counting on the often inconsistent daylight coming through a window. If there are windows in your studio room, it’s best to block out all natural light using thick curtains. Artificial lighting provides a lot more control over the final video image. Lighting the subject (in most cases, a person) correctly makes a huge difference when it comes to producing professional-looking video content.
The methodology behind beautiful studio lighting has long been established: by using the three-point lighting technique, you can achieve even, three-dimensional lighting for your subject. As the name suggests, basic three-point lighting involves using three light sources: a key light, a fill light, and a backlight or rim light. Generally coming in from the upper side, the key light provides the strongest light hit. The fill light, on the other hand, counters the harsh shadows created by the key light. The rim light, placed behind the subject, produces a little glow to the subject, separating it from the background. Learn more about how to easily set up three-point lighting.

Mounting
Professional light studios generally use a combination of ceiling-mounted lights and lights on C-stands. While convenient, C-stands can create clutter inside the studio space, while ceiling-mounted lights give a cleaner overall appearance. Lights can be mounted onto the ceiling using a system of trusses or rails. For example, a system of rails and scissor lifts much like this one facilitates easy movement of light panels in all directions.
Examples of studio lights
Choosing LED lights over incandescent light bulbs is a good idea. LEDs don’t radiate much heat, and the color of light (aka white balance) is easier to control. A few examples include Dracast PLUS series ceiling-mounted lighting and Savage RGB-50P Pro LED Panels. Many LED light panels have mobile or web UIs that let you access and control all their settings remotely. All the lighting must be connected to an Ethernet lighting controller interface for this to work.
Backdrops
For a polished look, professional studios employ large, seamless infinite white or green screen backgrounds, but these require a lot of space and can be pricey. For leaner budgets, multi-colored backdrop kits are available for under $100 USD. Another idea is to use a large display as a backdrop. Displays over 80 inches can double as green screens and let you pull up images, such as the company logo.
Using a non-solid background is acceptable, too. Something like a bookshelf or neatly arranged plants would make for a nice backdrop. The main tips here are to avoid clutter and make sure there’s enough separation between the subject and the background to create a blurry effect for the latter.
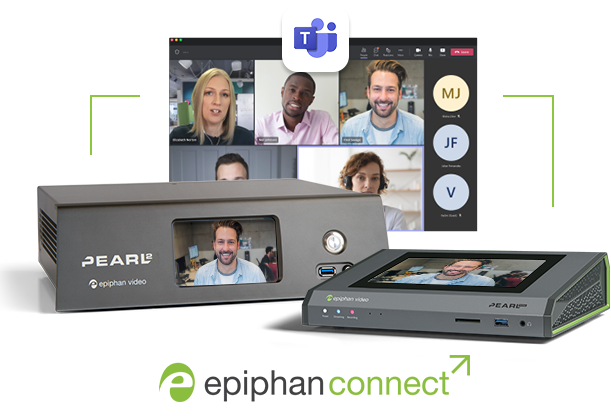
Simplify your corporate studio workflows with MS Teams
No matter where you are in your corporate video studio journey, you can start producing broadcast-quality live events today. Create spectacular content using the familiarity of MS Teams and the power of Pearl hardware with Epiphan Connect.
Discover Epiphan ConnectRecording and streaming
Recording
There are various ways of recording audio and video. Generally, audio is recorded separately on something like a Zoom recorder, and combined with the video track in post-production. Video is recorded onto memory cards. Make sure you choose a memory card with enough space (and speed) to record your footage.
Streaming
If you are planning to stream to Facebook Live, YouTube, or a private content delivery network (CDN), consider adding a hardware encoder to your setup. And with an all-in-one encoder like Pearl-2 or Pearl Mini, you can stream and record video simultaneously. Take advantage of Pearl-2’s professional features like confidence monitoring and adding brand elements to your stream with custom layouts.
To live stream, your facility will need ample dedicated Internet bandwidth. A minimum of a 15 megabits per second (Mbps) uplink is recommended. For mission-critical situations, consider investing in alternative connection options such as cellular bonding.
Live broadcasting
Going live on broadcast TV is a bit trickier than live streaming to a CDN. For one, broadcast stations have their own formats and restrictions regarding transmission feeds. Second, broadcast transmission signal quality must be superb. Third, latency needs to be minimal so that on-screen talent can hear and answer questions right away (and not after a 10-second delay). Consider looking into the services of an IP broadcast transmission provider if you’re planning to use your corporate video studio to appear on live television.
Sample corporate video studio gear list
- Camera – Canon EOS C300
- Lens – Canon EF 24-70mm f/2.8L II USM
- Lights – Dracast LED1000 3200K-5600K Bi-Color Light with DMX Studio Control (minimum 3)
- Tripod – Manfrotto 546GB Tripod with 502A Video Head
- Lavalier mic – Sennheiser AVX-ME2 SET Digital Camera-Mount Wireless Omni Lavalier Microphone System
- Audio Mixer – Bose T8S ToneMatch Mixer
- Streaming and recording – Epiphan Pearl-2 all-in-one production studio
- Adjustable height stool
- Network router
- Backdrop: Neewer Background Stand Support System with Backdrop OR Large (80”) TV display
- Optional: confidence monitor, teleprompter
Additional equipment
There are many other ways you can enhance your corporate video studio. This can include adding a teleprompter, a confidence monitor, or a clapperboard. Think about the furniture you might need: various filming setups might require different kinds. For example, you might want two comfortable chairs for an interview, whereas for a product demo you might want a sturdy, counter-height table and two variable-height bar stools.
Here’s a bit of advice that comes from personal experience: get some gaffer tape! It’s a real life saver. Use it for things like marking ideal locations on the floor, taping down cables so no one trips, and taming unruly microphone cables.
The more you use your studio, the more you will understand your needs. However, nailing down good audio, video, and lighting should be at the top of your list of priorities.
Enter: the remotely operated video studio
While it’s feasible for businesses to build their own studio as we’ve outlined here, it can be a significant time sink. Sourcing equipment, putting everything together, getting the spacing just right – all of this requires both time and experience.
If your company is keen to produce lots of video without the hassle of hiring a production crew every time, remotely operated studios are an excellent and cost-effective option. This way, video production becomes entirely hands off: AV professionals located remotely take care of anything: They can control all studio equipment through via virtual private network (VPN) and help direct the talent if necessary. With staff available 24/7, all you need to do is book time for the shoot, walk into the studio, mic up, and be ready to go.
Want to build a hands-off, in-house corporate video studio for your company? We can help! Reach out to us at videogenic@epiphan.com and we’ll be in touch.

Good article and thank you for this, a good read.
Keep up the good work, Luke
Industrial Engineering Video Productions.